

If you literally mean a tarp (fabric sheeting used as temporary weather protection), don't mount solar to it-tarps are not structural, tear under wind uplift, and any fastener hole destroys waterproofing. If you meant a tar roof (BUR or modified-bitumen asphalt roof), you can mount solar-either ballasted or mechanically attached-but only by anchoring into the structural deck and using a roofing-approved flashing detail. This guide covers both cases.
Step 0 - Identify the Roof You Actually Have
Tarp (fabric sheeting, temporary cover): Not load-bearing; tears easily; punctures = leaks. No direct mounting.
"Tar roof" (asphalt-based):
BUR (Built-Up Roofing): multiple felt/asphalt plies, often with gravel embedded on top.
Modified Bitumen (SBS/APP): torch-applied or cold-applied rolls, sometimes granulated.
If you're unsure, take close-up photos of the surface and edge terminations, or ask a roofer to confirm. The correct fix depends entirely on this distinction.
If It's a Tarp: Safe Alternatives (Do This Instead)
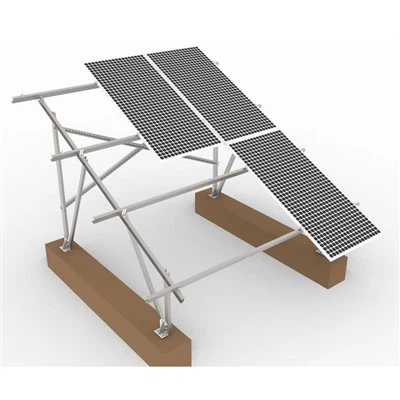
Ground or patio ballasted rack: Use a freestanding A-frame or ballast tray system with concrete blocks or sandbags. Anchor with guy-lines if you're in a windy site.
Attach to the real structure beneath the tarp: Build a small rack fixed to rafters or a deck inside the structure, separate from the tarp. Route cables cleanly, and leave the tarp intact.
Portable solar kit: For temporary power, use folding or suitcase-style panels with weighted stands; stow them in high winds.
Do not screw through the tarp and hope sealant will save it. That fails quickly and can cause water damage and safety hazards.
If It's a Tar (BUR/Mod-Bit) Roof: Compliant Methods
You have two mainstream ways to fix mounts on asphalt roofs:
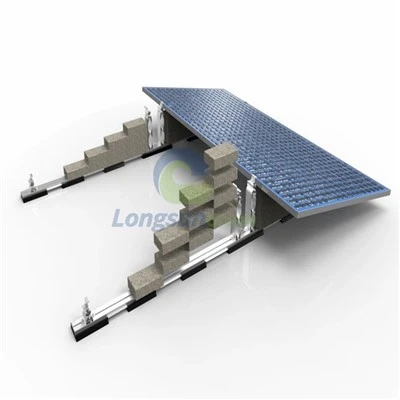
Method A - Ballasted (No Penetrations)
When to use: Flat or near-flat roofs where the structure can support extra dead load.
Concept: Concrete ballast holds aerodynamic racking in place; no holes in waterproofing.
Best practices:
Place separation/slip sheets (manufacturer-approved) between racking feet and roof to prevent abrasion and chemical incompatibility.
Follow the racking manufacturer's wind map: add ballast in edge/corner zones where uplift is highest.
Maintain clear drainage paths and service walkways; don't dam scuppers or gutters.
Caveat: Ballast weight can be substantial in high-wind zones-get a structural review.
Method B - Mechanically Attached (Penetrations With Flashing)
When to use: Where ballast is impractical or you need higher wind resistance with less weight.
Concept: Lag/anchor mounts into the structural deck or framing, then build a listed, roofing-compatible flashing around each penetration.
Attachment examples:
Wood deck/joists: Stainless lag screws into rafters/joists; verify pilot size and embedment depth.
Metal deck/purlins: Self-drilling structural fasteners or through-bolts to purlins; use isolation to control galvanic corrosion.
Concrete: Mechanical expansion anchors or adhesive anchors sized from pull-out testing.
Roofing details (pick what your roof system allows):
Chem-curb (pitch pan) system: Prime the cleaned roof area around the post, adhere a perimeter curb, then fill with pourable sealer rated for asphalt roofs to create a monolithic "bathtub" around the penetration.
Modified-bitumen boot/flashing: Mechanically fasten the base, then torch/heat-weld or cold-adhere a multi-layer bitumen flashing (base + cap sheet) up the post or base plate with termination bar and sealant at the top edge.
Golden rule: Flashing first, sealant second. Don't rely on mastic alone.
Coordinate with a qualified roofer so the detail remains within the roof manufacturer's warranty. Many roof warranties require an approved accessory and an authorized installer for penetrations.
Loads, Spacing, and Edge Zones (Don't Guess)
Design loads: Dead load (racking + modules, typically 2.5–3.5 psf / 12–18 kg/m²), wind uplift, snow, and seismic (where applicable).
Span tables: Use the racking manufacturer's tables for your wind exposure category, building height, and ground snow load to set attachment spacing and rail sizing.
Edge/corner zones: Uplift is highest near eaves, ridges, and corners. Attachments are often closer together in those zones, and ballast is heavier on ballasted systems.
Standoff and cooling: Maintain a uniform 1–4 in (25–100 mm) gap under modules for airflow; it improves performance and reduces roof heat.
Materials and Hardware (What to Use)
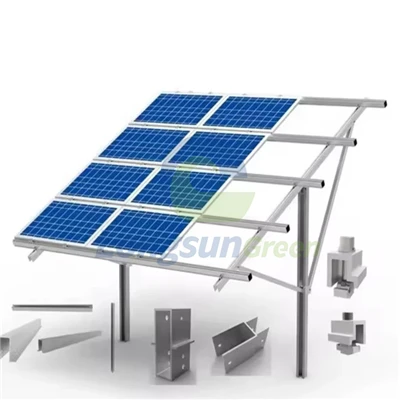
Mounts/racking: Listed systems compatible with BUR/mod-bit; for ballasted, molded feet with slip sheets; for mechanical, bases designed for bitumen flashing.
Fasteners: Stainless steel for exposed hardware; use anti-seize to prevent galling. Match anchors to the deck type; record torque and embedment.
Roof flashings: Chem-curb kits or mod-bit plies specified for your roof (SBS/APP). Use the roof manufacturer's primers, mastics, and granule surfacing where required.
Corrosion control: Isolate dissimilar metals (stainless/aluminum to galvanized steel) with appropriate washers/pads.
Wire management: UV-rated stainless clips, shaded routing under the array, drip loops at penetrations, and listed roof boots for conduits.
Step-by-Step: Mechanically Attached Example on Mod-Bit
Layout & locate structure
Mark rafter/purlin lines (attic verification, test drilling). Avoid drains, valleys, and parapet flashing transitions.
On gravel-surfaced BUR: sweep/strip gravel to clean felt; prime if required.
Set the base
Pre-drill and fasten the mount base to the structure with specified anchors. Confirm torque and embedment; photograph each point for records.
Flash the penetration
Option 1: Chem-curb around the post/base; prime, adhere curb, pour sealer to spec; tool a crowned surface for drainage.
Option 2: Bitumen boot: torch/heat-weld or cold-adhere base ply and cap sheet up the post/base; press edges; finish with termination bar + compatible sealant.
Install rails and modules
Respect rail cantilever limits and add expansion splices on long runs.
Clamp modules strictly within approved clamp zones from the module datasheet; torque clamps evenly.
Bond and route wires
Use integrated bonding clamps or listed lugs to create a continuous equipment ground.
Keep cables off hot/abrasive surfaces; clip every 12–18 in (30–45 cm).
QA & documentation
Tug-test conductors; shake-test rails; verify all flashings are fully bonded with clean terminations.
Record torque values, anchorage photos, module serials, and an as-built layout.
Common Mistakes to Avoid
Mounting "into the tar" only: The asphalt layer is not structural. Always anchor into joists/purlins/deck or use ballast with engineering.
Relying on mastic instead of flashing: Caulk dries and cracks; flashing is the waterproofing.
Skipping surface prep on gravel BUR: Flashing won't bond to loose ballast-strip, clean, prime.
Clamping outside module zones: Risks glass stress and voids the module certification.
Ignoring thermal movement: Long rails need expansion joints; cables need slack and gentle bends.
Blocking drainage: Ballasted feet, rails, or conduit should never trap water at scuppers or drains.
FAQs
Can I anchor through a tarp into the deck?
You can anchor to the deck, but the tarp will be compromised and leak. If a tarp must remain, cut, lap, and properly patch or replace it after installing a separate, permanent roof boot/flash-better yet, remove the tarp and work on the real roof system.
Is ballasted always better on asphalt roofs?
It's great for avoiding penetrations, but only if the structure can support the added weight and your wind zone doesn't demand impractical ballast. Many projects combine ballast with a few mechanical "anchors" in edge/corner zones.
What sealant should I use?
Use roof-system-approved primers, mastics, and pourable sealers compatible with SBS/APP or BUR. Generic silicone is not an acceptable primary waterproofing on asphalt roofs.
How high should the array sit?
Typically 1–4 in off the roof for airflow; follow your racking manual.