

Installing solar panels on a flat roof presents unique challenges compared to sloped rooftop systems. Without proper planning, projects can face structural issues, waterproofing failures, and costly delays. This guide outlines key considerations and best practices for a successful flat roof solar installation.
Pre-Installation Assessment
Before any equipment arrives on-site, four critical evaluations must be completed:
1. Structural Load Capacity
Flat roof solar systems typically use concrete ballasts to secure the mounting structure, adding significant weight to the roof. A typical ballasted system adds approximately 3–6 pounds per square foot (psf), with edge and corner zones potentially requiring 10–20 psf due to higher wind uplift forces. A qualified structural engineer must verify the roof's remaining load-bearing capacity before installation proceeds.
2. Waterproof Membrane Condition
The roofing membrane is one of the most expensive components of a flat roof. If the existing membrane (TPO, PVC, EPDM, or modified bitumen) is over 10–15 years old, replacement or repair should be considered prior to solar installation. Inspect for cracks, blistering, ponding damage, and general degradation.
3. Drainage Path Planning
Flat roofs are not perfectly level-they incorporate a slight slope to direct water toward drains and gutters. The mounting layout must not obstruct these drainage paths. Blocked drainage can lead to standing water, leaks, and premature membrane failure.
4. Available Space and Shading Analysis
Measure the usable roof area, accounting for module layout, maintenance access pathways, and fire safety setbacks. Identify existing rooftop equipment (HVAC units, exhaust vents, skylights) and potential shading from nearby buildings or structures.

Mounting System Selection
Three primary mounting approaches are available for flat roof projects:
Ballasted Mounting (Most Common)
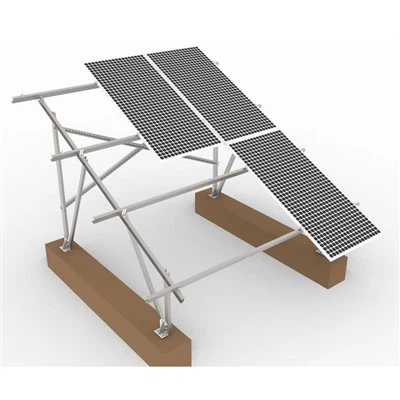
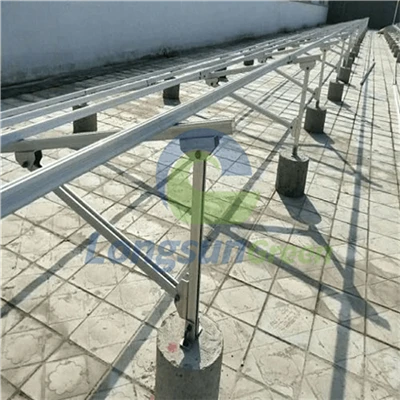
How it works: Concrete blocks or ballast trays secure the racking system by gravity alone-no roof penetration required.
Advantages: Preserves membrane integrity, installation is 20–30% faster than penetrating systems, and the system can be easily removed or reconfigured.
Best for: Membrane roofs (TPO/PVC/EPDM) and projects where waterproofing integrity is paramount.
Mechanically Attached (Penetrating)
How it works: Fasteners penetrate the membrane and secure directly to the structural deck.
Advantages: Superior wind resistance; suitable for high-wind zones or roofs with limited load capacity for ballast.
Critical note: Every penetration point requires proper flashing and sealing. Coordination with the roofing manufacturer is essential to maintain warranty coverage.
Hybrid Systems
How it works: Ballasted throughout the main array area, with mechanical anchors added at edges and corners.
Advantages: Reduces total ballast weight by 15–25% while ensuring safety in high-wind zones.
Installation Best Practices
Foundation and Racking Installation
Clear the roof surface of debris and mark foundation positions according to engineering drawings.
For expansion bolt anchors, control hole depth and diameter precisely, and use an air pump to clean drilled holes.
Maintain vertical alignment tolerance of ≤±1 mm per meter and angular deviation of ≤±1°.
Main rails must remain parallel to the roof surface; rear support posts must be perpendicular.
Module Installation
Maintain a minimum clearance of 300 mm between the lower module glass surface and the roof to allow for airflow and drainage.
Secure lower clamps first to prevent modules from sliding during installation.
Use string lines or a spirit level to ensure uniform module flatness across the array.
Grounding and Cable Management
The mounting structure must be reliably grounded using 40×4 mm galvanized flat steel.
Cables should be routed through UV-resistant, waterproof conduits and secured at regular intervals to prevent sagging or abrasion.

Critical Considerations
1. Zoned Ballast Design (ASCE 7-22)
The ASCE 7-22 standard divides flat roofs into three wind pressure zones: interior (Zone 1), edge (Zone 2), and corner (Zone 3). Corner zones experience uplift forces 2–2.5 times greater than the interior. Never apply uniform ballast weight across the entire roof. Adding extra ballast at edges and corners can reduce total material usage by 15–25% while enhancing overall safety.
2. Membrane Protection
Always install approved slip sheets or protective pads between ballast trays and the roofing membrane to prevent abrasion caused by thermal expansion and contraction.
Use compatible rubber padding-different membrane materials (TPO, EPDM, PVC) require specific protection products.
3. Roof Edge Setback
Maintain a minimum setback of 4–6 feet from roof edges to reduce wind uplift pressures and comply with fire safety codes.
4. Module Tilt Angle
Flat roof systems generally require a 10°–15° tilt angle to enable rainwater self-cleaning and optimize sunlight capture. Notably, reducing the tilt angle by 5° can lower wind pressure coefficients by approximately 15–20%-a valuable consideration in windy regions.
5. Common Pitfalls to Avoid
Do not sacrifice drainage channels or maintenance access for maximum module density.
Ensure adequate spacing between module rows to prevent inter-row shading.
Use walkway pads throughout installation to protect the membrane from tool drops and foot traffic.
Final Thoughts
A successful flat roof solar installation begins long before the first module is mounted. Thorough structural assessment, careful system selection, and adherence to best practices-from zoned ballasting to membrane protection-are essential to ensuring a safe, durable, and high-performing system.
For project-specific guidance tailored to your roof type, wind zone, and module specifications, our engineering team is ready to assist.

Longsun Green is a professional solar mounting structure manufacturer dedicated to providing reliable, high-quality support solutions for photovoltaic projects worldwide.
Media Contact: Amber
Email: amber@longsungreen.com
Website: www.longsungreen.com