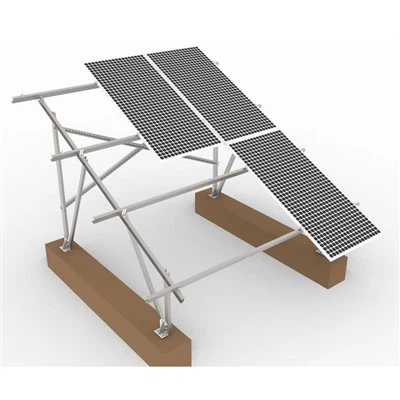


Attaching PV modules to a roof combines fall hazards, structural loads, waterproofing, and high-voltage DC. Use full-body fall protection, follow the module + racking manufacturer manuals, and comply with local building/electrical codes. If structural anchorage or electrical tie-in exceeds your license or experience, hire qualified professionals.
Step 1 - Identify Your Roof & Choose The Right Attachment
Asphalt/Composite Shingle
Hardware: Flashed L-feet or standoffs lag-bolted into rafters.
Method (outline): Locate rafters from attic/roof → lift shingle course → slide metal flashing so its upper edge tucks under the course above → pilot-drill rafter → drive lag screw to spec → set L-foot/standoff → reseat shingle.
Principle: Flashing is primary; sealant is secondary. Never rely on caulk alone.
Standing-Seam Metal
Hardware: Seam clamps that grip the vertical seam-no penetrations.
Notes: Verify seam type and panel gauge; torque clamps per spec; allow for thermal expansion.
Corrugated/Trapezoidal Metal
Hardware: Crest-mounted brackets with EPDM/butyl gaskets fastened into structural purlins.
Tips: Fasten on high ribs (crests) for drainage; avoid valleys and thin sheet-only connections.
Tile (Concrete/Clay/"S" Tile)
Principle: Never bear on tile; anchor to deck/rafter beneath.
Hardware: Tile hooks or replace-tile flashings with base plates and raised posts.
Method: Remove tile → mount base to structure → integrate a flashing pan beneath the upslope course → trim/replace tile for post clearance.
Low-Slope Membrane (TPO/PVC/EPDM)
Options: Ballasted racks (weight-based) or mechanically attached stanchions with welded boots.
Coordination: Work with a commercial roofer to maintain membrane warranty.
Step 2 - Engineer Loads, Spacing & Edge Zones
Loads to cover: Dead load (~12–18 kg/m² for modules + racking), wind uplift, snow.
Use the racking manufacturer's span tables for your wind exposure, building height, and ground snow load to set attachment spacing and rail spans.
Respect edge & corner zones (higher wind pressures at eaves/ridges/gables).
Keep rail cantilevers within limits (often 300–400 mm; model-dependent).
Maintain a uniform standoff gap (≈25–100 mm) for airflow and roof longevity.
Add expansion joints in long rails; leave gentle slack in conductors for thermal movement.
Step 3 - Fasteners, Embedment & Corrosion Control
Embedment: Lag into rafters/purlins-not sheathing. Confirm rafter centers from below and above; pilot-drill and measure embedment depth per hardware spec.
Materials: Stainless steel fasteners with flat + lock (or spring) washers; use anti-seize where specified to prevent galling.
Isolation: Where stainless meets galvanized steel, use isolation washers/interfaces to reduce galvanic corrosion.
Torque: Use a torque wrench; record values for inspection.
Step 4 - Waterproofing That Actually Lasts
Flash first, sealant second. Shingles get sheet-metal flashings under the upslope course; tiles get formed replace-tile flashings or pans; membranes get listed boots.
Place penetrations high on a shingle where possible; form drip loops on cables; use listed roof boots for conduits.
Never block module weep holes; orient modules so drains sit at the bottom edge.
Step 5 - Module Interface: Clamp Zones & Mounting Holes
Clamping (most common): Modules clamp to rails using mid/end clamps positioned strictly within allowed clamp zones shown on the module datasheet (often at 1/4–1/3 of the span). Wrong clamp points can crack glass or void ratings.
Bolt-through (when specified): Framed modules usually have pre-drilled holes/slots on the rear frame for certain racks/trackers.
Frameless/glass-glass: Use frameless-rated clamps or tested point supports-no holes to bolt through.
Never drill new holes in frames/glass; that voids certifications and warranty.
Step 6 - Wire Management, Bonding & Labels
Wire routes: Keep conductors shaded under the array, off hot/sharp surfaces; use UV-rated stainless clips every 30–45 cm; avoid cheap zip ties that embrittle.
Penetrations: Use roof boots and, where exposed, rain hats; separate power and communication cables per code.
Bonding/grounding: Many modern rail/Clamp systems provide integrated bonding (teeth bite through anodizing). If not, install listed ground lugs at the module's earthing hole with a continuous equipment grounding conductor sized per code.
Rapid shutdown/labels: Install required devices and permanent placards at service equipment and rooftop locations.
Step 7 - Attachment Workflow (Roof Example)
Layout: Snap chalk lines parallel to ridge/eave; mark rafter lines.
Install attachments: Flashed L-feet/stands (shingle), seam clamps (standing-seam), crest brackets (corrugated), tile hooks/replace-tile flashings (tile).
Set rails: Level and square; splice with bonding splices; respect cantilever and expansion rules.
Mount modules: Clamp within zones; torque evenly; confirm row plane is flat to avoid module twist.
Manage wires & bond: Clip conductors; form drip loops; land grounds; keep junctions accessible and shaded.
Document: Photograph attachments, serial numbers, torque logs, and as-built layout for O&M and inspection.
QC & Commissioning (Mechanical Focus)
Mechanical: Attachments torqued; no lifted shingles, cracked tiles, or crushed seams; rails level/square; standoff uniform.
Waterproofing: Every penetration flashed, not merely caulked; conduits booted; no holes in valleys.
Electrical-adjacent: Wires strain-relieved; grounds continuous; electronics (microinverters/optimizers) mounted to rails unless otherwise listed.
Final walk-down: Shake-test rails, tug-test conductors, verify clear firefighter pathways and label placements.
Common Mistakes (And Better Practices)
Missing structure / shallow embedment → pull-outs & leaks
Fix: Confirm rafter centers twice; pilot-drill; measure embedment; never depend on sheathing alone.
Relying on caulk instead of flashing
Fix: Use listed flashings/boots compatible with the roof; sealant only supplements.
Clamp outside allowed zones
Fix: Follow the module diagram; keep clamps where certification testing assumed.
Wire sag & UV damage
Fix: Stainless/UV clips at regular intervals; keep runs under modules, off edges.
No thermal allowance
Fix: Expansion splices and cable slack; avoid hard-anchoring long rails end-to-end.
Tile breakage
Fix: Remove/trim tiles and use replace-tile flashings or properly sized hooks; never shim or bear on tile.